What happened???
Well you see a little youtuber called “Acerola” made a little video and put out a challenge. As a creature fueled by an unholy combination of caffeine and raw impulse, I had to take on this “Acerola Furry Challenge” and exceed.
The Challenge
Acerola’s original video did a breakdown for how shell fur works and demonstrated how to get it working in Unity. As an elite Godot game dev, I was able to port most of it over quite easily. Acerola’s challenge was to implement the fur rendering he demonstrated in the video, and then extend the functionality in at least one key way.

Goku from Dragon Ball Z power up to super saiyin
Well what is “Shell Fur”?
If you already know Shell Fur and just wanna get to the results, you don’t need to read this.
Shell Fur is named for the way it implements fur rendering. It utilizes a common method for sub-vertex geometry visualization. If you do work with 3D game development and/or tech art, you are probably at least familiar with normal maps, and possibly parallax rendering (height maps) for materials. Both add extra visual detail without requiring extra vertices. Shell fur does a similar effect by layering multiple meshes on top of each other and selectively discarding specific pixels based on some kind of algorithm. Essentially, if you break the UV coordinates into a smaller grid and then discard pixels at the edges of each cell, you would get a square fur, similar to what Acerola references in the game Viva Pinata. By doing a little extra math you can discard anything outside of a circle in the cell. Then going out along the layers you can shrink the size of the circle. With enough layers, this creates a visual effect that resembles strands of fur. Something that is incredibly helpful about this method is that while it does increase the vertex count, it does so by such a small margin compared to the details provided. Because we do a lot of our calculations on the pixel level, for a game where furry objects can’t be looked at too closely, it can look quite realistic while not incurring too much of a performance hit. Of course I love games with style and I found that it can quite easily create stylized effects as well.

The boykisser meme character smirking
So what did I do?
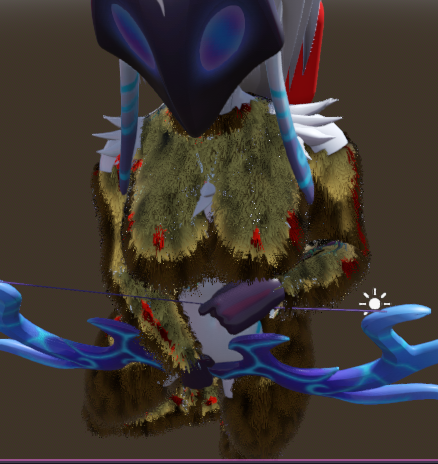
First, I simply wanted to get fur working. So I made a simple system that would make duplicates of the mesh and extrude every single vertex slightly out based on the provided “strand length” and “shell count”. Through that we could make the layers, or shells, very easily. Additionally, it felt appropriate to be placing fur on a character rather than on a cube or sphere. So I searched “furry” into sketchfab and found a League of Legends character called “Kindred”. So I used this mesh and it actually didn’t work.
How do extrusions work?
I used a nifty tool in Godot called MeshDataTool, which has some lovely documentation. Basically it can load a surface from one mesh, perform manipulations on the data, and then push that new mesh to a mesh object (which could be the original mesh but it wasn’t in this case). So what I did is I loaded each surface and iterated throught the vertices. The MeshDataTool provides a lookup to get all face indices touching a given vertex index. Then I got the normals of each connected face and averaged them out. I normalized the average normal and then multiplied it by the shell layer depth. The original vertex is then offset by that value and we move to the next one.
I’m actually really interested to see what kinds of fun procedural mesh generation I can do with the MeshDataTool in the future. I believe I could push new vertex data to it should I have something interesting for it. Maybe I could even make a voxel renderer with greedy tiling?
It’s rigged
So the character model was rigged for an animation, which I thought would be cool to try to make the fur work properly with it. However something about how rigged meshes work means that the original mesh would be properly deformed by the skeleton and the fur meshes would not. It actually resulted in the fur shell meshes doing a T-pose while laying on the ground behind the properly rendering character. Which was quite frustrating. I am not terribly familiar with how skeleton rigs and mesh deforms actually work in terms of the mesh data, so I decided to just strip the rig and make it a static mesh.
With the stripped mesh, everything was working wonderfully.
Next I took on working on different systems that could make the fur look nicer.

A Hatsune Miku model in a t-pose rotating
Shader improvements
I wanted to make the fur look nicer, and one way to do that was to use some fun shader stuff. In Godot 4 we have instance uniform variables in shaders which are uniform values that can be assigned on a per-MeshInstance3D basis. So I was able to give each shell layer information on what percentage of the depth it was at and also assigning strand colours. Realistically, the strand colours didn’t need to be on a per-instance basis, but I did it so…yeah.
Simulation improvements
So you may have noticed that the fur doesn’t really do anything and just sticks straight out. So what I wanted to do was add a basic physics simulation, especially a better one than Acerola made in the video (sorry not surry, bud). I used some basic physics lerping and damped the physics affect factor based on a curve resource.
Godot Resources Are Magical And You Better Use Them Or Else

James from Pokemon crying happy tears
Something that was really awesome for me when I first moved to Godot from Unity way back in 2020 (yeah I switched before it was cool) was the sheer quantity of useful resources available to be as a developer. And the ability to just export that and use it to manipulate stuff was incredible. They’ve only gotten better over time. Though Curve is definitely a classic. It’s simply a curve that supports different handle types and can have multiple vertices as well. I generally used it for making a basic smoothstep function, but the curve resource is fully customizable to change the thickness of strands along their length.
I was able to use Curves not only for visual thickness but also for the simulated “stiffness” of the strands along the length. What that means is that you can choose which parts of the strand are stiff and which aren’t.
Working in realtime
So all of this is technically working in real-time. One trouble is that the fur shells don’t exist until the game starts and a behemoth of mesh generation is done (at startup!!!)
And then…?
What comes next may surprise you… I made a plugin. Of course I made a plugin. I’m an addict for plugins. Tooling is love and tooling is life.
A Shell Fur Plugin
Recently I got to see the lovely GodotCon talk by Miguel (bitbrain) talking about tooling in Godot. It was a great talk and if you love Godot you should really check it out. One of the key things I learned from the talk (at least that is relevant here) is the difference between “addon” and “plugin” in godot. “addon” is literally just something third party. Plugins are specifically code that is registered with the engine and requires the
plugin.cfgfile for godot to handle it. Basically, all plugins are addons, but not all addons are plugins.
So I got to work on a proper plugin for this shell fur. I had a few hopes, but I wasn’t sure what would all work in-editor so I had to play around with.
A key difference in my approach was in my programming language. For my original development, I chose to use C# since it’s one of my favourite languages to use with Godot. However, for this plugin, I wanted to make it compatible with more projects (and most people don’t use C# to my knowledge. Yes you may gasp now.) So this was ported to GDScript. Since, to my knowledge, there is no transpiler from C# to GDscript, I did basically rewrite everything but in a different language. On the bright side, I got to play with some of the new GDScript features introduced to recent versions of Godot such as static var and typed arrays.
Once I had the basics up and running for the shell fur I wanted to make some spicy stuff (No, no, not that! Where’s the damn spray bottle?). I wanted to see how much of the fur I could get running in the editor. That means mesh generation, real-time editing of fur properties, and physics. It turned out surprisingly well, excepting a few key areas.
Basically, the mesh generation takes a ton of processing time (1.5 seconds in some instances). Which causes a huge stutter if I do it synchronously. But if I try to use a coroutine or a thread, I have to make sure I’m managing data access (async code is hell). I spent days just trying to get different asynchronous bits of code working. In the end I never actually got it to work. I opted to just have buttons at the top (inserted by a custom InspectorPlugin, which are surprisingly easy to set up!). The buttons would either trigger mesh regeneration, or purge the shell meshes. I did have to learn a bit more about editor instanced nodes. For example, if they don’t have an owner, they don’t save. If you don’t have an EditorInterface reference, you can’t tell the editor that it needs to be saved. Oh and that group you’re using to separate out your instanced meshes out from the other meshes in the scene that really need to not be messed with? Yeah you gotta add the group slightly differently to ensure it stays when saving, else it gets purged upon reload.
(Lewd Joke Incoming) Plugin development is a either like sex or school team projects: either way I’m getting fucked, all that changes is if I’m having a good time or not.
I had to do a lot of work trying to make the asynchronous code work and ended up failing after trying for almost an entire week. And it’s probably worth mentioning that I’m currently (as of writing) unemployed. I was putting 9-10 hours a day for like 5 days into this and couldn’t make it work. I want to believe there is a fundamental gap in my knowledge that is causing this problem, but I was unable to figure it out with all that time so if you know how to make it work submit a PR or something? It’s open source.
That rant out of the way, what I did manage to get working was basically everything else on my checklist. Additionally, I added the option to provide a texture to the fur, which would let you do more intersting stylings for the fur. And this is where the strand colours being a per-instance and not a per-material uniform gets really fun. (And it was totally on purpose and definitely not a happy accident). The instance colours are multiplied on the texture colour, which lets you have colour variations across instances of the same fur material, for example if you wanted to have a slight variation across several furry creatures. (Frankly if you wanted to make a wetness system you could modify the colour and stiffness. However currently the roughness and metalness are on a per-material basis so a shader rewrite may be needed to make that totally work as desired.) Hey speaking of shader rewrites, I made an option so the fur tool will allow you to load a custom material instead of the default material. So while the default material is pretty robust, if you want a different style you can totally do that. You could even go so far as to have a custom shader so long as the uniforms match the expected names and types.
Also if you are super cool and awesome, there might be a few “easter eggs” in the plugin to find. Mainly because I can’t help myself when I’m banging my head into the wall for days. I needed something fun, so now you get to deal with it. XOXO

Toradora laughing with the caption ‘menace to society’
Future Plans
I’m not entirely certain if I have any plans for this addon. I did get an issue requesting support for older Godot version, since static var isn’t actually supported in Godot 4.0. So I rewrote some sections that would allow compatibilty for all currently available 4.X versions. If at some point people want to use it with 4.3 and there’s some breaking change, I could look into upgrading it, but with projects like this I generally do a “lazy maintenance” approach. That is, because I am not personally using this tool in my own projects, I don’t have any real needs for it. I could theoretically develop it forever. So instead I let it sit and if someone submits an issue I’ll look into fixing it, or mark the plugin as archived/unmaintained. Really I probably have several repositories that I need to do that for, so if I ever have a boring afternoon I might have to spruce up my GitHub repos.
As this plugin is MIT licensed and fully open source, anyone is free to fork it and make it their own, or even better they can do a pull request for adding new features to the plugin. But that is only really meaningful if there are a decent number of people using the plugin, and as far as I am aware the total number is zero. That could definitely just be my limited ability to see who uses my tools. I really can only see when people star the repo on GitHub. Downloads from there and from the Godot Asset Library are completely opaque and provide no insights as to whether anyone is using my tools. Which can feel disheartening at times since I can’t ever be sure if all of this work is for nothing.

Sucy from Little Witch Academia shrugging
Please I beg of you

A young anime girl with a pleading look on her face (I don’t know the character or anime lol)
If you use a plugin, even once, go tell the creator(s) that you used it. Tell them how you feel about it, especially if you really enjoyed it (And maybe keep things kind and constructive if you had a negative experience). It really means a lot. Frankly, everyone who creates things for others wants to know that people are enojying it. Can you imagine what it would be like if you published a game and the platform you published on didn’t have comments, views, downloads, or anything for analytics??
While I’m on this topic, it really stretches well beyond the confines of game development! I don’t talk about it much, but I recently self published a book. I spent maybe a year or two on it and to this day I have barely any insights into what people think besides my family members that tell me. Everyone who creates for others, deserves to hear that their creations sparked joy, even if it was just for a moment. Even if it was something dumb.
Also the reason I don’t talk about the book much is that it had some pretty personal stuff in it that if I linked in my socials would basically doxx me. My next novel is gonna have absolutely nothing unsafe and it’s gonna be published under a different pen name so I’ll be totally safe to hype it up for my online friends.
Showcase
")
Showing off how the fur reacts to motion (in a simulation of physics)

The fur can handle PBR materials as well. Here it’s a reflective gold, smoothed because it’s using the base normals of the mesh instead of individual strands

A little tool allows setting the stiffness of the strands along their length, which can create some interesting effects

It also supports realtime texturing. In this example I used a noise map to make a weird cheetah print