This guide is primarily aimed at game developers who may not have explored options for project organization and management. If that’s not you, enjoy learning about my personal workflow
Obsidian, a note-taking app with (mostly) good features
As much as I do love FOSS (Free and Open Source Software), Obsidian is my favourite app to use for notes and organizing my ideas. I’ve used it for everything from project management, sequence planning, personal to-do lists, notes for a story I’m writing, and even school notes!
One of the most valuable uses I’ve found is organizing my thoughts for game design!
Scaffolding Ideas
Obsidian uses a superset of Markdown, which is a pretty nifty language for formatting text. (I’m even using it for formatting this blog!)
Because of this, the text is pretty quick to format without needing to leave your keyboard.
Callouts in Obsidian
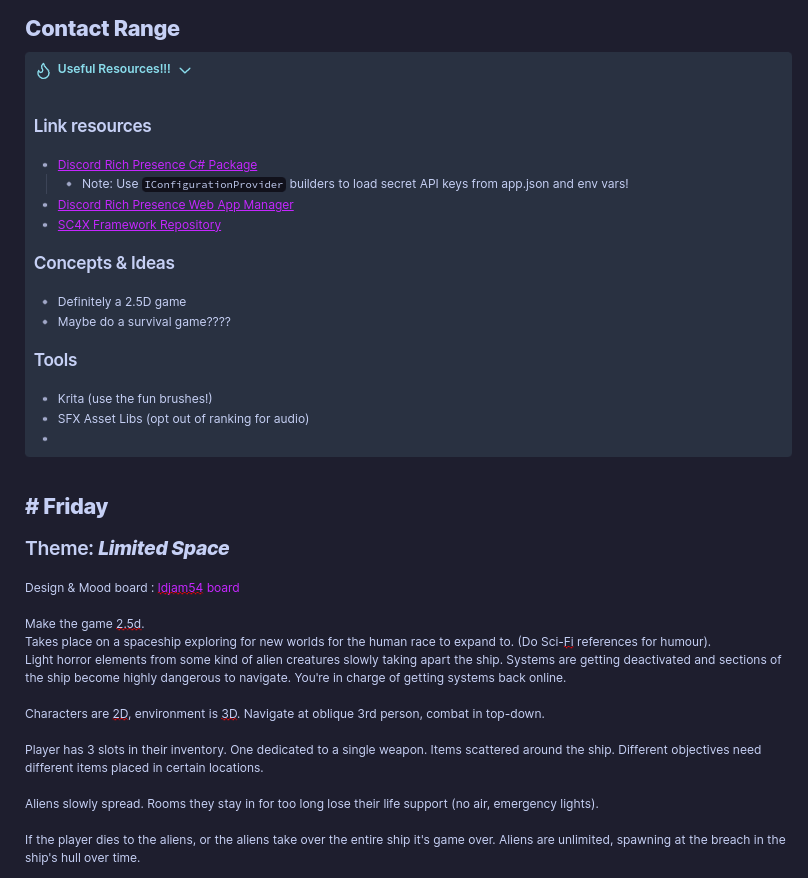
You can see in the picture above that I’m using a “callout” to mark some useful resources for developing Contact Range. I didn’t end up using all of them to be fair. But the callouts can be super helpful for specific ideas and there’s a few different kinds of them with associated colours and names.
This is the syntax I used above. Note that it acts as an extension of the ‘quote’ formatting that uses > prefix to each line. The heading is specified by square brackets ([]), and an exclamation point (!) prefixed key-word.
>[!hint]+ Useful Resources
> ... text ...
Also if you note that the square brackets are ended by +, that’s a collapse notation. It tells Obsidian that we want to be able to collapse the callout down to the header, but by default we want it to display as full. For defaulting to collapsed, you would rather use -. Following that is the title of the callout. If you omit it, the keyword default title will be used as a heading. For example !help would become “Help”
My most used key-words are:
- hint
- help
- info
This is usually because my notes focus on expressing information. And so the callouts are extra information that would be used.
Headings
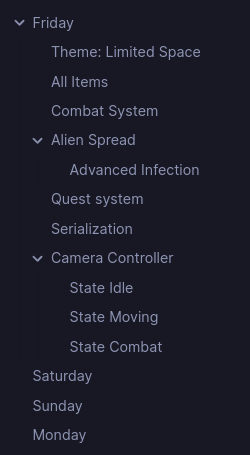
Headings in any text document are incredibly useful. In obsidian, they are automatically built into a table of contents on the right pane.
This pane is collapseable for when you really want to focus, but is super helpful for larger documents.
Super-charged Links
Remember what I said about Obsidian using a superset of Markdown. Here’s where that matters. So links work just like regular markdown, even for images. To review, the format is:
[Link Text](https://www.your-link.net)

Obsidian introduces a new type of link called a “Note Link”. It allows you to reference other note pages you have written which helps to connect different elements that each have their own concise pages. I use this more for writing stories, so each character, faction, location, etc… will get their own page with links connecting everything where relevant.
[[Full Name Of The Note You Want To Link]]
Important to note: the page name will provide auto-complete suggestions, but it is most helpful when your pages uses unique names across the “vault” (obsidian’s currently scoped directory).
Let’s Make a Game
Now that you’re equipped with a basic understanding of how to write effective notes in Obsidian, let’s look at how that relates to game development and design.
Putting Down Ideas
You will probably want to start with a document where you just “brain dump” on the page. Text notes are good. All you are doing at this phase is getting ideas on ‘paper’, or page perhaps. Once it’s all written down you can start to review what you wrote and see if any ideas coalesce. If you are working as part of a team, sharing the document and reviewing it together could be better. But most of my experience is solo dev, so it’s just me babyyyy!
After getting the ideas organized and cleaned up, you can start working on the next few phases.
Organizing Sequences
So you’ve got a game idea now and you want the player to do X, Y, Z, using items Alpha, Beta, Gamma, and talking to NPCs 1, 2, and 3. How do we organize that!?!?
My solution is to use a “core plugin” called “canvas”.
To setup canvas you need to open the settings menu with the cog icon in the bottom left corner. Then go to “Core Plugins” and enable “Canvas”. Optionally, you can fiddle with the options for Canvas using the cog button on the same line, or in the left pane under the “Core Plugins” header. My preferred change is to set “Default location for new canvas files” to “Same folder as current file”. By default they drop to the vault’s root directory.
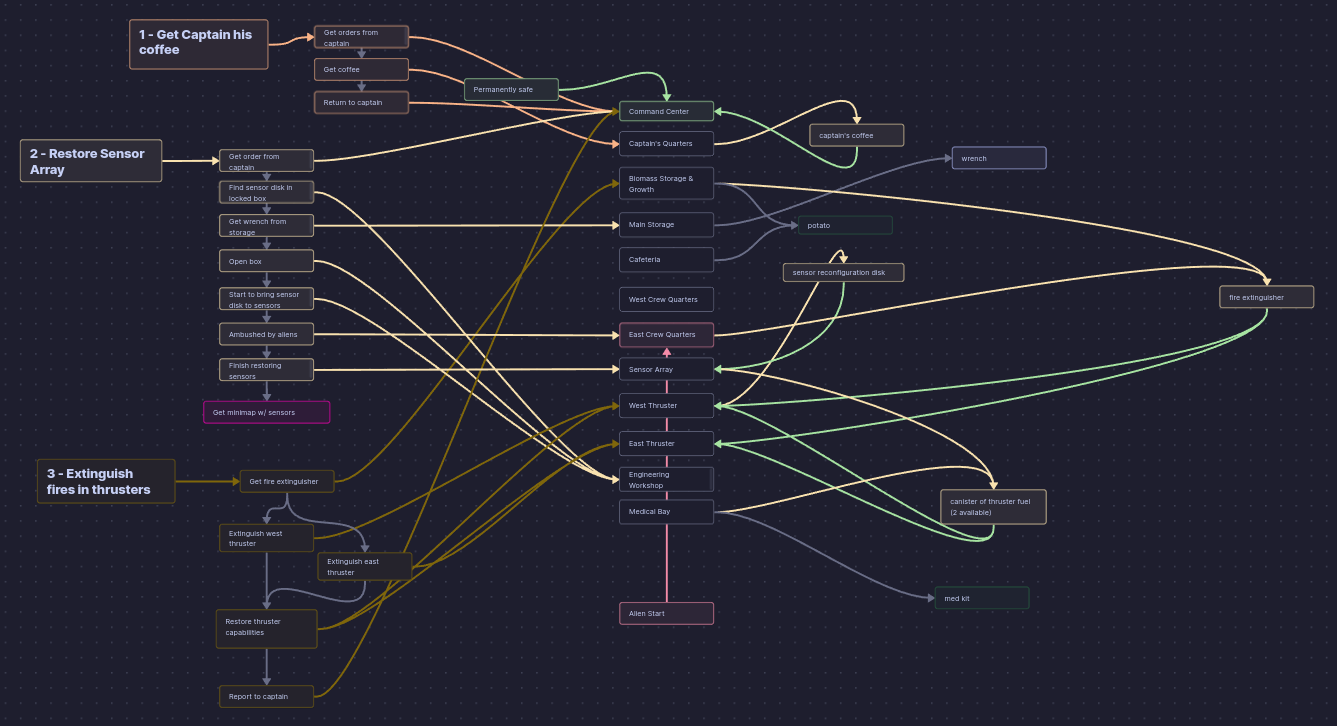
A canvas is a generic node graphing tool that you can use to make beautiful spaghetti
You might want to open that image in a separate tab if you want to be able to read the text. Otherwise, just trust that I’m being truthful.
There are three main types of nodes allowed:
- Generic Text
- Note
- Picture
Generic text is just a block that you can put text into and style it how you like. If you look closely I used headers in some nodes to mark the “quest lines”. Note Nodes allow you to link an existing notes into the canvas as a resizable node. You can even scroll through the entire document from the canvas if you like. Finally Image Nodes are as expected, an embedded image. Combined with the ability to create connections between nodes, assign directional arrows, colours for node blocks and connections, and a theoretically infinite canvas, organizing structures of information is definitely possible.
For my purposes I made every room, item, and ‘quest action’ into a node. Then I connected them to help me map the players progress through the ship. I wanted to ensure they spent time in all of the rooms since the aliens were going to spread throughout the ship and attack the player in any of the rooms.
If you are reading through the canvas above and have played Contact Range, you might have noticed that not everything from the canvas was implemented. Sorry about that! That’s what happens during game jams, ruthless feature cutting
Managing the Project
If you have experience with DevOps you’re probably good to skip this. Unless you wanna help me find any mistakes I made <3
So with your ideas put together and some rough (or maybe not so rough) sequencing figured out, now you need to break it down into manageable and–most importantly–actionable tasks. This is where “Project Management” (PM) rears its ugly head. Most of PM work is not exceptionally difficult in theory, but almost always is difficult in practice. There are so many different methods for organizing tasks into small chunks that can be assigned to individual team members. My favourite is a Kanban Board. It’s a fairly simple process. You organize tasks into “cards” that describe the task and maybe some additional meta-data like who’s assigned to it and/or what category of task it is (art, code, sfx, etc…). For me, I usually skip the assignment step since it’s usually all me.
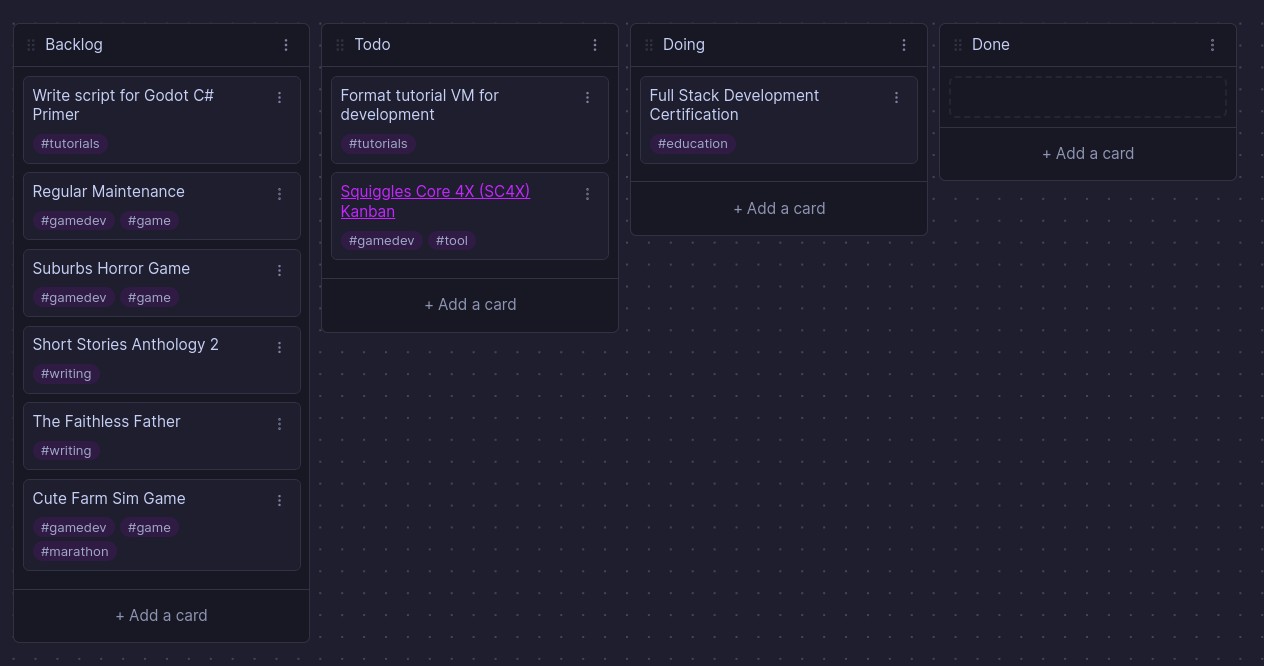
Here’s an example of a kanban board. Specifically one I use to organize my personal life tasks. Once something makes it to the “Done” channel I like to archive it so it doesn’t clutter up the view. If you are perceptive, you probably noticed that I’m still using Obsidian. There is a “Community Plugin” (not maintained by the Obsidian Devs) called “Kanban” by “mgmeyers” that I use almost religiously. It adds a type of note that is a Kanban board which allows you to specify which lanes you want. There is also tools for things like due dates, tagging, and styles. You can even make styles react to the tags or date proximity on the card. For example, when I used this for school I made green, orange, and red colour styles based on how urgently the task needed to be done (based on 7+ days out, 3+ days out, or less than 3 days away, respectively)
You can even add styling specific to a single Kanban board or have those settings globally. Which is super powerful.
Endless Cards
A simple approach is to make a card for each “thing” you need to do. So for each asset to make, it gets a card. For every system that needs code, that’s a card. For every QA work done at a step in the process, that’s another card! And when the moon hits your eye like a big pizza pie, that’s another card amore!
There’s a ton of solutions for figuring out how to organize your cards. In my experience the solution that’s best is the one that works for you and your needs.
One such solution that I use for projects larger than a game jam are “Epic Cards”. It’s a way to create a hierarchy of tasks and categorize them into a particular order. I’ve seen many people use Epics almost like versioning. So once that “Epic” is complete that’s 0.1 more version points. (For clarity, I mean a project at version 1.2 would go to 1.3 after the 1.3.X epic is compeleted. And subversions, 1.2.X, would increment as stable changes are made.)
Of course that’s not the only way to organize your tasks. I highly recommend looking into modern technique of project management if you are more interested in this. Without being more familiar with what industry standards look like, I’m hesitant to make a particular recommendation.
Building to Completion
Now you’ve got your idea, the sequences, and your tasks all organized. That was the easy part. Your next steps are to make it all happen. This is where you “get your hands dirty” and work on the code/art/model/shader/SFX/music/VFX/API/etc… necessary for your project!
From here I can’t quite help you. Or rather, I can’t in this article. Obsidian is an excellent tool for organizing all of the game design components. But once you transition to the development, Obsidian is mostly useful as a refernce. Best of luck. I hope you have an enjoyable project! Or at least an interesting one!


